When your computer won’t start, it’s more than a minor hassle. It can feel like everything just stopped—especially if you need it for work, gaming, or keeping in touch. The good news is you can often narrow down the problem with a few simple checks before moving on to deeper troubleshooting. This guide walks you from basic power checks to more hands-on steps, and then into what to do if the issue is software- or hardware-related. Step by step, you’ll be able to figure out what’s actually keeping your computer from turning on.
Power and Connection Checks
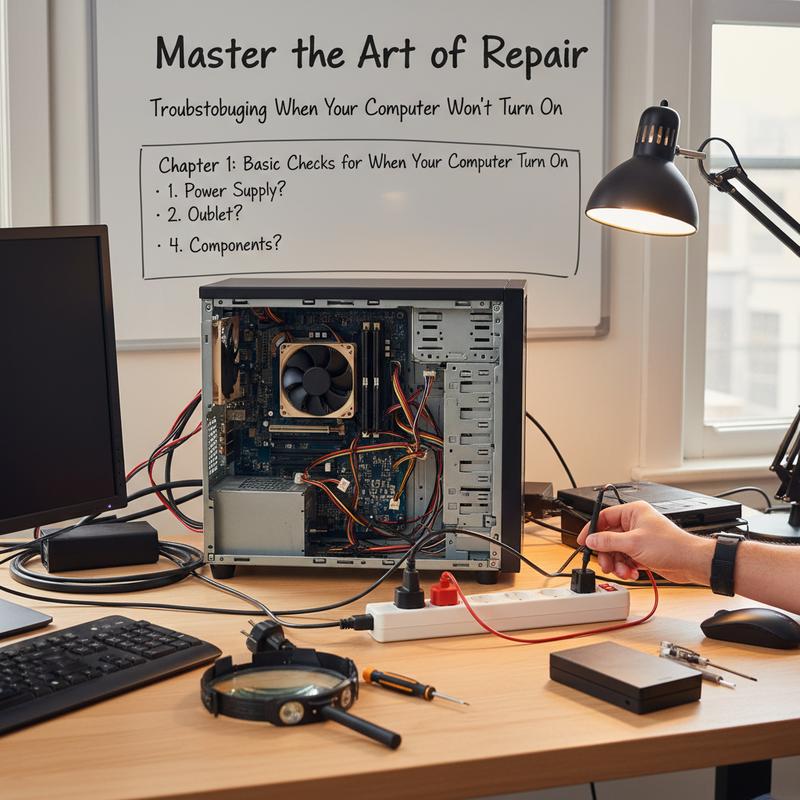
If your computer won’t turn on, the cause is often something simple—usually power or a loose connection. Running through these basics first can save you a lot of time (and money) before you jump into bigger fixes.
Start with the power source. Make sure the power cable is plugged in snugly both at the computer and at the wall. Cables can wiggle loose, especially if the machine was moved. To confirm the outlet actually works, plug in something else like a lamp or phone charger. If the outlet’s dead, check your circuit breaker or try another socket. Using a power strip or surge protector? Make sure it’s switched on, and if you’re not sure it’s working, plug the computer straight into the wall. Power strips can fail without any obvious signs.
On desktops, check the power supply unit (PSU) switch on the back and confirm it’s set to “I” (on). It’s easy to miss. Also, unplug and firmly re-seat the main PSU power cable—small movement over time can loosen it. On laptops with removable batteries, take the battery out and unplug the charger before you move forward.
Next, try a power cycle to clear out leftover charge that can cause weird startup issues. Unplug the computer completely (and remove the laptop battery if you can). Hold the power button down for 15 to 20 seconds. Wait a moment, plug it back in, and try again. Thing is, this simple reset can bring a “dead” computer back surprisingly often.
Now disconnect all peripherals—USB drives, printers, external hard drives, keyboards, mice, and extra monitors. Some add-ons can block startup or pull power in the wrong way. Try booting with only the essentials connected (a display, and basic input if needed). If it starts, reconnect devices one at a time to find what’s causing the problem—sometimes it’s a bad device, sometimes it’s a driver issue.
If you do get any signs of life, pay attention to them. Look for power LEDs, spinning fans, or hard drive activity lights. Those are good clues that the system is at least getting power and trying to start, even if it doesn’t fully boot.
You can also test whether the system is responding at all by pressing NumLock and seeing if the keyboard light toggles. If nothing changes, the PC may not be getting past BIOS/POST, which can point to internal hardware trouble. And if the computer has power but you’re staring at a blank screen, try Windows key + Ctrl + Shift + B to reset the display driver.
If none of this works, think back to any recent hardware changes. New RAM, a different drive, or a graphics card can stop a system from booting if it isn’t seated right or isn’t compatible. If you’re comfortable doing it, open the case and double-check that internal cables and parts are firmly connected. But if the computer is under warranty, don’t take it apart. At that point, looking into BIOS or CMOS reset guides can help too—resetting firmware settings can fix some startup problems.
If the computer still shows zero signs of power—no lights, no fans, nothing—the PSU or another major component may have failed. After you’ve done the basic checks, getting a pro diagnosis is usually the safest move so you don’t accidentally make things worse.
If you want to go a bit deeper, it can also help to understand how a full restart process fixes common problems. You can read more restart strategies here.
Starting with power and connection checks gives you a clear, logical path—either you get the computer running again quickly, or you know it’s time to move on to more serious troubleshooting.
Intermediate Troubleshooting Steps
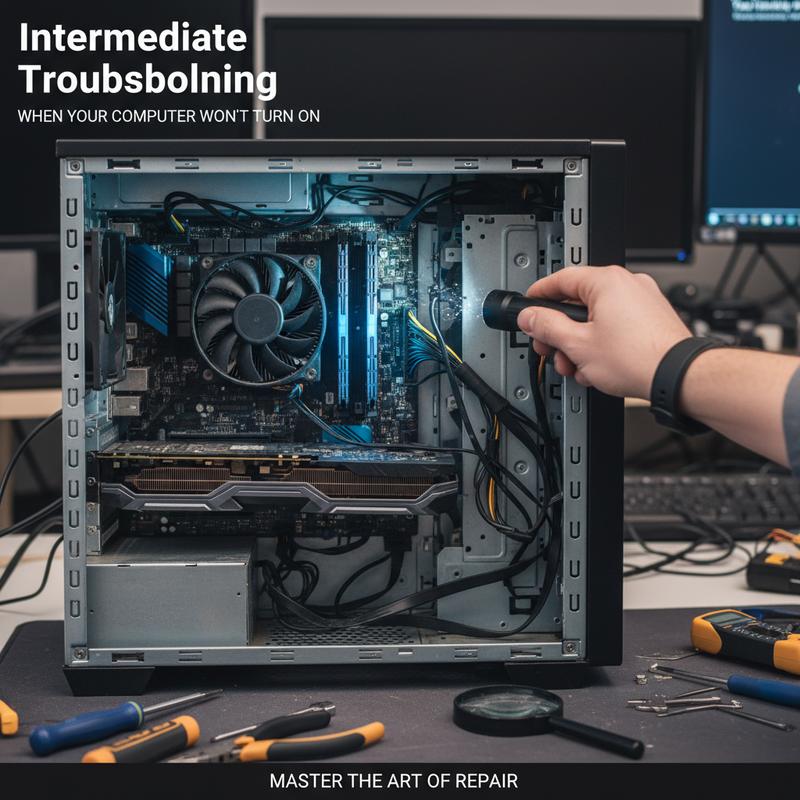
If your outlet and power cables check out but your computer still won’t start, it’s time to move into intermediate troubleshooting. This is where you look at internal connections and resets that can fix problems that basic checks won’t catch.
Before you open anything, unplug the computer completely and switch off any power strip or surge protector. Safety first. Once the case is open, check the cables going to key parts like the motherboard, graphics card, and storage drives. A loose connection can stop power or data from flowing the way it should. And if RAM sticks or expansion cards look even slightly unseated, remove and reinsert them firmly.
If the problem started right after you installed new hardware or software, remove the new additions temporarily. New parts can clash with existing hardware, and bad drivers or installs can cause startup failures too.
Still, peripherals can cause trouble as well. Unplug anything non-essential—USB drives, external hard drives, printers, extra monitors, even the keyboard and mouse if you want to be thorough. Some devices can hang the system during POST. If the computer boots after disconnecting everything, plug devices back in one at a time until you find the one that triggers the issue.
If the computer turns on but you get a blank screen, a reset may help. On desktops, resetting the CMOS (either by removing/reinstalling the CMOS battery or using a motherboard jumper) can restore BIOS settings to defaults. On laptops, you may be able to do an Embedded Controller (EC) reset, which varies by brand and model—usually a key combo or battery/power procedure. These resets can help a lot after BIOS updates, hardware swaps, or memory changes.
If Windows is running but the screen is black, try Windows key + Ctrl + Shift + B. It forces a graphics driver reset and can bring your display back without restarting the whole system.
Watch the lights when you try powering on. If you never see HDD activity, the system may be stalling early—sometimes at the BIOS stage—often due to RAM or motherboard issues. You can also press NumLock and see if the LED responds. If it doesn’t, that’s another clue the system isn’t getting very far.
Some computers (including many HP models) let you run built-in diagnostics by pressing F2 right after you power on. Those tests can help confirm whether memory or other hardware is failing.
These steps sit in the middle ground: beyond simple cable checks, but not full-on part swapping either. And if you still can’t get it to start after trying them, it may be time for deeper testing or professional help.
For more tips on restarting and fixing everyday PC issues, you can also check restart fixes most problems.
Advanced Troubleshooting Steps
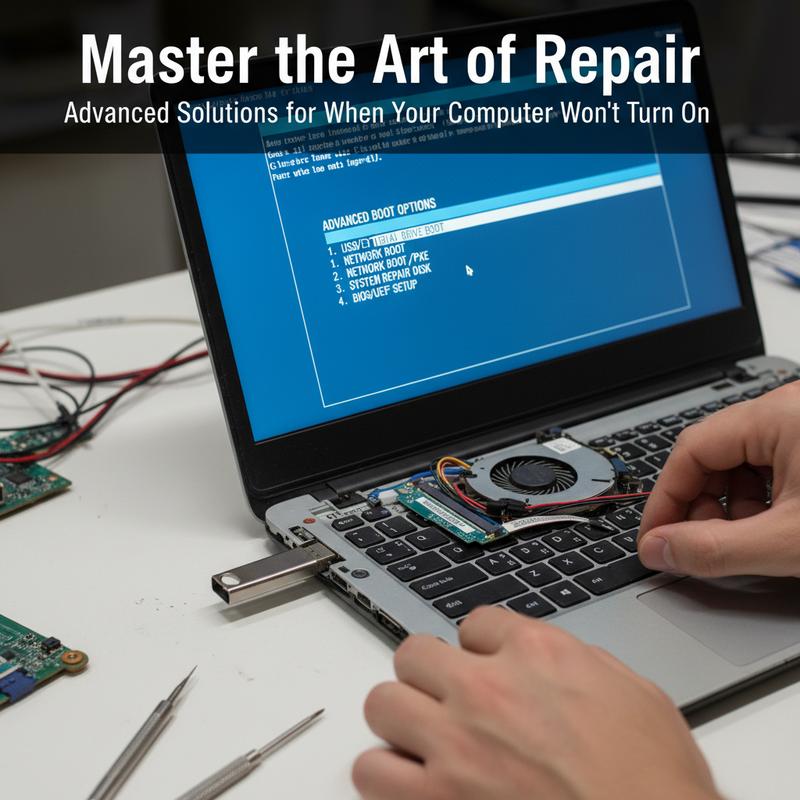
If your computer still won’t turn on after the basic steps, you’re in advanced troubleshooting territory. The goal here is to isolate failing hardware or fix firmware settings that block startup. Go slow, be careful, and test one change at a time so you don’t create extra problems.
First, confirm the system is getting steady power. If the outlet and cable are fine, the next suspect is the power supply unit (PSU). The PSU converts AC power into the DC power your components need. When it fails, you may get nothing at all—no lights, no fans, no noise. If you can, test it with a PSU tester or swap in a known-good PSU to see if that’s the issue.
After that, open the case and reseat the main components. Heat and vibration can loosen parts over time. Start with RAM: remove each stick and reinstall it firmly, and try different slots if needed, testing boot after each change. Bad or poorly seated RAM is a very common reason a computer won’t POST or get past BIOS.
If you have a dedicated graphics card, remove it and check it for dust and poor contact. Reinstall it carefully, and make sure the PSU power connectors going to the GPU are fully clicked in. A loose GPU power cable can stop the system from starting correctly.
If you’re still stuck, clear the CMOS to reset BIOS settings. This can fix firmware settings that got corrupted or misconfigured—often after updates or hardware changes. Unplug the PC, disconnect peripherals, and try booting with only the essentials connected: CPU (with cooler), one RAM stick, and the required PSU connectors. Then remove the CMOS battery for a few minutes and put it back in. That restores BIOS defaults.
Try powering on with that minimal setup. If it starts, add components back one at a time—extra RAM, the GPU, drives—rebooting after each addition. So if something breaks the boot process, you’ll know exactly what triggered it.
If the PC powers on but won’t load the operating system, shift to software troubleshooting. Boot from a USB with antivirus tools to check for malware that blocks startup. You can also try Safe Mode to narrow down driver and software conflicts. Getting into Safe Mode or recovery menus depends on the manufacturer and the system settings.
Sometimes, the issue is bigger than a quick fix. Motherboard failures and tricky electrical problems often need proper tools and experience. If you’re not comfortable opening the system or you’re unsure what you’re seeing, getting help from a qualified tech can save you time and prevent accidental damage.
Once you know these advanced steps, you’re in a much better position to deal with stubborn startup failures—and in many cases, bring the system back without guessing or replacing random parts.
If you suspect malware might be part of the problem, check out this ultimate guide on malware detection and defense.
Finding Hardware vs. Software Causes

If your computer won’t turn on, figuring out whether it’s hardware or software can be frustrating. But a step-by-step approach—starting with power, then hardware checks, then software testing—usually gets you to an answer without a lot of wasted effort.
Start by confirming power is actually reaching the device. Check the power cable and make sure it’s secure at both ends (wall and PSU). Test the outlet with another device. On desktops, confirm the PSU switch is on (the “I” position). If the cable looks damaged or you suspect it’s bad, try a known-good cable. Power strips and surge protectors also fail more often than people think, so bypass them if you can.
If you see lights on the case or keyboard but the screen is blank, the system might be hanging early in startup. Press NumLock and see if the keyboard light toggles. If it doesn’t, the system may be frozen before the operating system even loads. Unplug all external devices—printers, USB drives, extra monitors—to rule out conflicts. Then watch the hard drive activity light. If there’s no activity and no response, you’re likely looking at hardware trouble (motherboard, RAM, or graphics card are common culprits).
For deeper hardware checks, unplug the computer and open the case to inspect connections. RAM, expansion cards, and cables can loosen over time due to movement and heat. Reseating them—making sure they’re fully seated—can fix boot failures. Also remove any recently installed hardware to rule out compatibility or installation issues. And don’t ignore dust: heavy buildup can cause overheating, which can stop a system from starting. Cleaning fans and heatsinks helps keep temps under control.
On the software side, if the computer powers on but won’t boot normally, Safe Mode is a great test. It loads only the basics, which makes it easier to spot driver or software conflicts. If it boots in Safe Mode, a recent driver update or software install is often the reason normal startup is failing.
You can also boot from a USB drive with another operating system or antivirus tools. That lets you scan for malware and check whether the system can run outside your normal Windows install. Malware can mess with system files and boot settings, and that can stop a PC from loading. It’s also smart to review BIOS settings if you recently updated firmware or changed hardware—restoring defaults can fix settings that block startup.
If you’ve tried these steps and the system is still dead or unresponsive, it’s time to bring in a professional. Issues involving the motherboard, PSU, or CPU often need specialized testing.
Once you know whether the problem is hardware or software, the next steps become much clearer. And if you want an extra safety net for the future, take a look at how to protect your PC and set up a Windows restore point—it can make recovery a lot easier later.
Final thoughts
If your computer won’t power on, there’s a clear set of steps you can work through—starting with basic power checks and moving up to deeper hardware and software tests. The key is to take it in order, so you’re not guessing or replacing parts you don’t need to. And if you hit a wall, getting professional help can keep the situation from turning into a bigger (and more expensive) problem.
Still stuck and just want your PC working again? IT Carolina can take a look and help get it running without the runaround.
Learn more: https://itcarolina.com/about/
About us
IT Carolina provides on-site diagnostics and repair for computers that won’t turn on. Whether it’s a failing power supply, a motherboard problem, or just a cable that came loose, our technicians find the issue and get your system working again. We focus on reliable repairs and a low-stress experience, so you can get back to what you actually need your computer for—work, entertainment, or gaming.