Setting up a brand new printer can seem daunting, whether you’re a small business owner looking to optimize office operations or a home user eager to start printing personal projects. This comprehensive guide makes the process manageable and straightforward, covering everything from unboxing to connecting via Wi-Fi, USB, or Ethernet. Each chapter is dedicated to helping you understand and execute critical setup phases, ensuring your new printer is ready to meet your demands. From handling ink or toner cartridges to initial configurations and paper loading, you’ll find actionable insights to streamline the setup process, minimize errors, and start printing efficiently.
The First Step to Success: Unboxing and Preparing Your New Printer for Setup
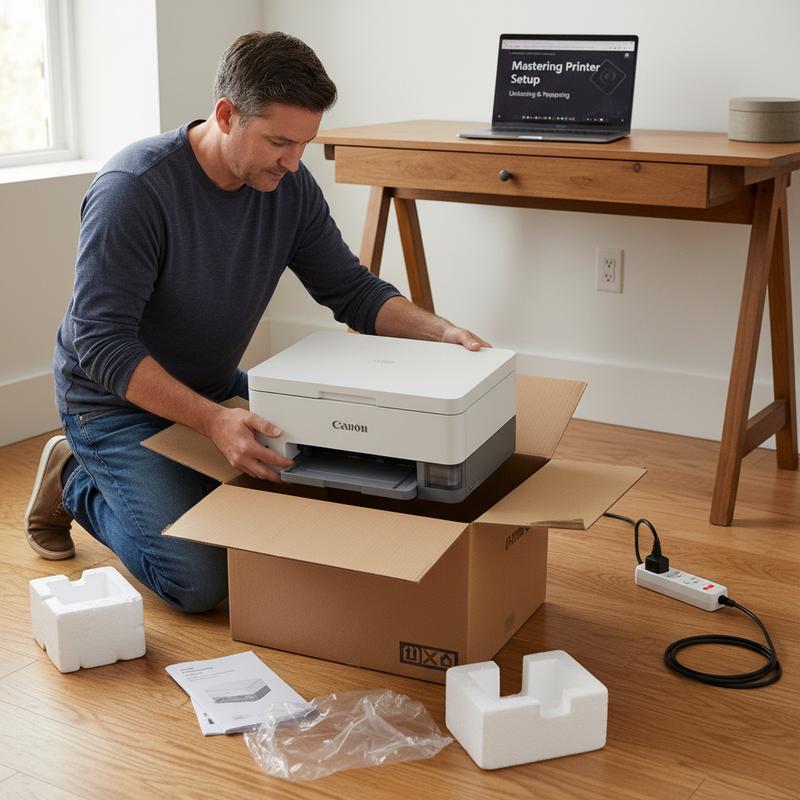
Setting up a new printer begins with a conscientious process of unboxing and preparation, laying the groundwork for a flawless installation. Handle with care as you crack open your printer’s packaging. Avoid deep slices with your cutter or scissors to prevent accidental damage to the machine or its components.
After opening the box, methodically remove each piece of content: the printer itself, essential documentation, the power cord, ink or toner cartridges, and any additional accessories nestled within. Lifting a printer can sometimes require some strategic maneuvering—especially with larger models. Place the box on its side if needed and carefully use handles to extricate the device.
Inspect the printer for any protective materials that need to be removed. Strips of tape, plastic wrap, and foam inserts serve as a first line of defense during transit but must be removed before setup. Pay special attention to easily overlooked areas, such as the scanner bed, cartridge area, and paper trays, to ensure all packing materials are cleared. Any lingering fragments can impede functionality.
Once the printer is free from its packaging armor, situate it on a stable, flat surface. Preferably, choose an area that is shielded from direct sunlight, which can degrade components over time. Furthermore, positioning it close to a power outlet and your computer or router simplifies connectivity.
For more detailed instructions on integrating your printer with your workspace environment, you might consider checking out IT Carolina’s resources on home office setups.
Finally, remember to conserve all packaging and documents. These materials are invaluable not only for troubleshooting but also for potential warranty claims. Armed with the right precautions, your new printer will be perfectly poised for the next phases of setup, minimizing the chances of setbacks down the line.
Powering Up: Bringing a Brand New Printer to Life
Setting up a new printer presents a fresh opportunity to seamlessly integrate essential technology into your workspace. With anticipation, the moment you connect the printer to power signifies a critical step towards turning your device from a simple piece of hardware into a functional element of your daily activities. Careful attention at this stage ensures that the printer is ready for further configuration without unnecessary interruptions.
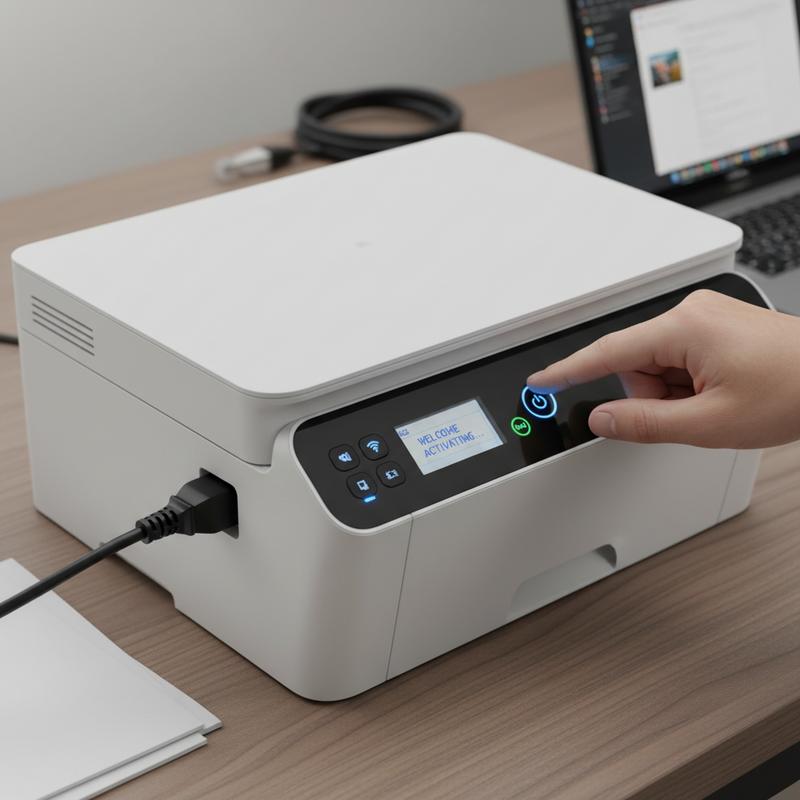
To begin, place your printer in a dry, accessible location, making sure it is near a power source. This initial placement is important as it allows you to connect the printer’s power without the use of adapters or extensions, given the potential risks of power fluctuation. Directly plug the provided power cord into the printer’s power port and insert the other end into a wall outlet. Avoid power strips when possible to ensure a steady electrical supply, thereby safeguarding the device’s components from electrical surges.
Once the printer is powered, it should come to life. If it does not activate automatically, simply press the designated power button. This initiates the setup process through the printer’s control panel display. Expect to complete the basic configuration by selecting your preferred language and region, ensuring the device is ready to interact with your local settings. Follow all instructions carefully, which may include setting date and time.
As part of your setup, the next steps will involve installing ink or toner cartridges. At this juncture, the printer is energized and craving to perform. For those interested in exploring related services, you might find worthwhile insights at IT Carolina, a resource that could enhance your setup experience.
This comprehensive activation ensures your printer is poised for optimal functionality. Remember, detailed attention at the outset leads to a smoother calibration and eventual use, setting the stage for a reliable printing journey.
Seamlessly Installing Ink or Toner in Your New Printer
Setting up a new printer involves many crucial steps, with installing ink or toner being one of the most vital. This step is pivotal not just for ensuring your printer functions properly but also for achieving optimal print quality from the very start. Whether you’re dealing with an inkjet or a laser printer, the process entails careful attention to detail.
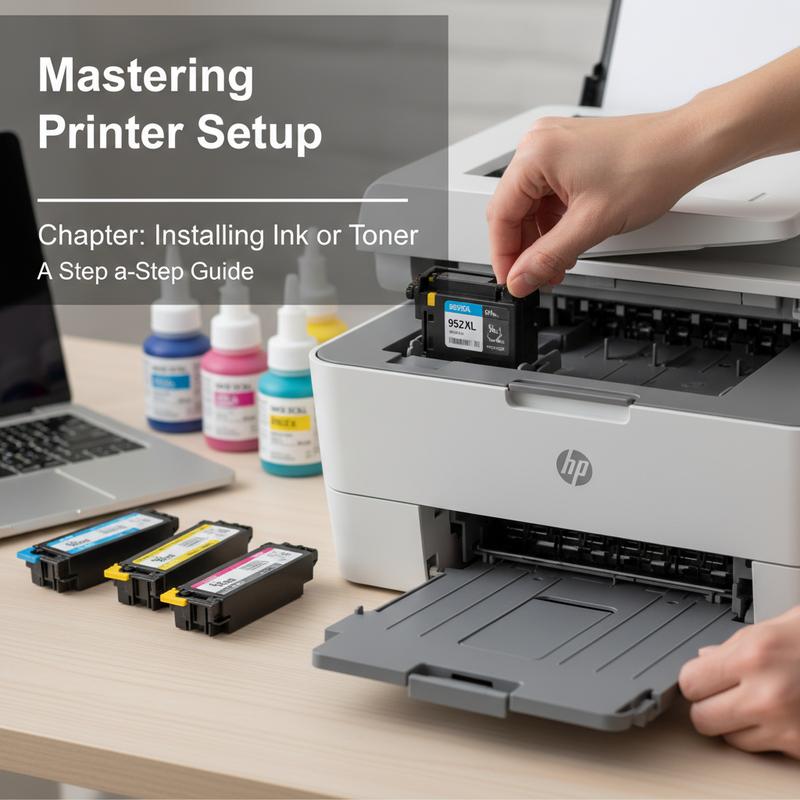
Begin by opening the printer lid or the front access panel to expose the cartridge holder. This applies to both inkjet and laser printers, though the positioning may vary slightly depending on the model. Remove the new ink or toner cartridge from its packaging with caution. For inkjet cartridges, avoid touching the copper contacts or nozzles to prevent any potential damage. In laser toner cartridges, a gentle shake before installation ensures the toner is evenly distributed, promising consistent print quality.
Proceed by removing any protective cover or tape from the cartridge. This may involve peeling off a strip for inkjet models or pulling out a seal tab for laser toners. Carefully align the cartridge with the designated slot in the printer, ensuring you match any color coding. Applying gentle pressure, push the cartridge into place until it clicks securely. This click is a reassuring signal that the cartridge is installed correctly.
Once the cartridge is in place, close the printer lid or access panel. Some printers might automatically begin an alignment process or prompt you via their display to print an alignment page. Following these prompts is crucial as it calibrates the print heads and ensures top-notch quality.
In some cases, you might encounter difficulties such as the printer not recognizing the cartridge. If this happens, remove and gently clean the cartridge contacts with a lint-free cloth before reinstalling. Always ensure you are using the correct cartridge type for your printer model. For more tailored assistance, consider exploring the printer service options available online for professional support.
By following these steps, your printer will be ready to produce excellent quality prints right out of the gate, simplifying your printing tasks and enhancing your setup experience.
Mastering Paper Loading: A Crucial Step in New Printer Setup
When setting up a brand new printer, one often underestimated step is loading paper correctly, which is integral to ensuring your device functions smoothly from the get-go. This process might seem straightforward, but precision at this stage can prevent future issues such as paper jams or misfeeds. Let’s walk through the basics of properly loading paper into your printer during setup.
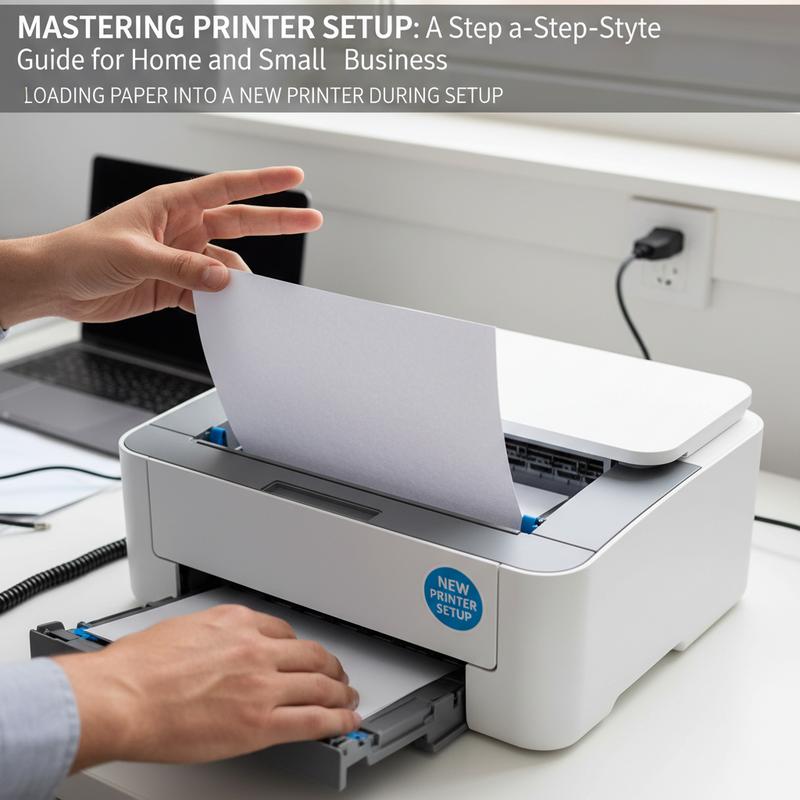
Start by identifying and opening the main paper tray, usually located at the front or bottom of the printer. Gently pull it out, being careful not to force it, which can cause mechanical problems. Once the tray is open, you’ll notice paper-width guides along the edges. These need to be adjusted outward to accommodate the stack of paper you’re about to load.
Next, insert a stack of plain paper. Ensure the correct orientation by placing the print side, generally the whiter or smoother side, facing down. Align the paper stack with any markers within the tray to avoid loading too much paper, which can result in jams. This alignment ensures your printer processes the paper smoothly, essential for avoiding technical difficulties.
With the paper stack inserted, slide the width guides back in until they touch the edges of the paper. This step ensures that the paper stays straight and feeds correctly during printing. If the guides are too tight, they might crinkle the paper; too loose, and the paper could misalign within the tray.
Once the paper is securely in place, close the tray by pushing it back into the printer until you hear a click—indicating it’s locked into position. Some printers may prompt you to confirm the paper size and type on their display. Comply with these prompts to ensure smooth subsequent operation.
Ensure you extend the output tray to catch your printed pages, which prevents them from falling to the ground and getting damaged. By following these steps, you mitigate common issues like paper jams, contributing to a seamless printer setup. For more in-depth support on setting up your printer, check out our printer services.
Seamless Printer Connections: Mastering Wireless, USB, and Ethernet Setup
Setting up your new printer’s connection to various devices is a crucial step that determines the efficiency and flexibility of its use. Understanding and following the right approach for wireless, USB, and Ethernet connections ensures that your printer is ready to perform seamlessly in any environment.
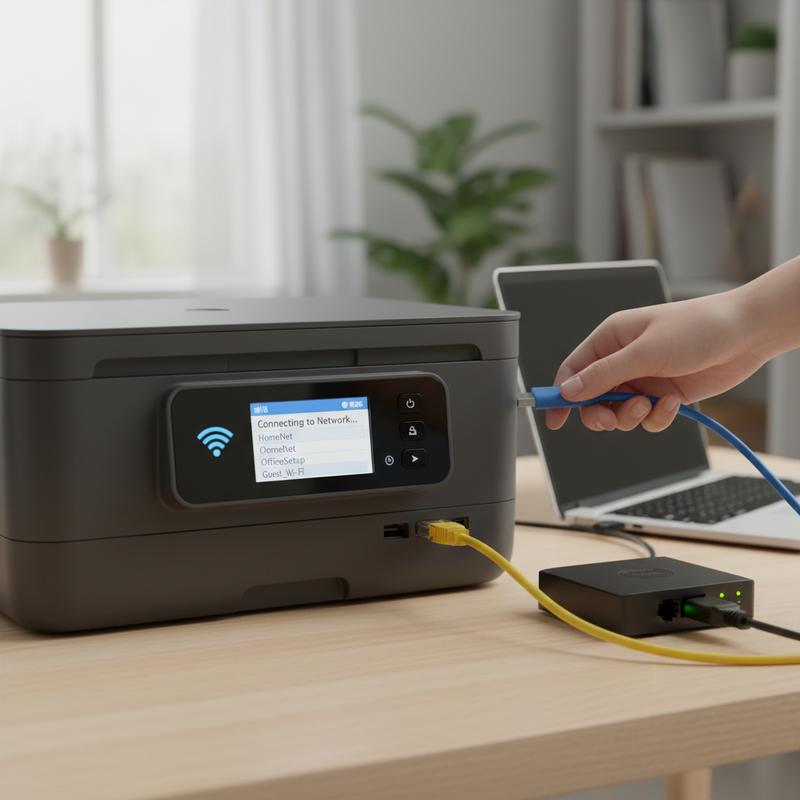
Connecting via Wireless (Wi-Fi)
Wireless is the most versatile method, allowing multiple devices to communicate with the printer without clutter from cables. Start by accessing the printer’s network settings on its display, usually under terms like Wireless LAN Setup. Choose your network, enter the password, and confirm the details. If your router supports WPS, simply press the WPS button on the router and the corresponding button on the printer to establish an automatic connection. Alternatively, on computers, the printer can be added through system settings: on Windows via Settings > Devices > Printers & Scanners, and on Mac through System Preferences > Printers & Scanners.
USB Connections for Simplicity
For straightforward setups, using a USB connection is ideal. Simply connect the printer to your computer with a USB cable. Most operating systems will instantly recognize the device and guide you through any necessary driver installation. However, it’s wise to download the latest drivers from the printer’s website before connecting to avoid compatibility issues.
Ethernet: Stable and Reliable
In environments where a stable connection is paramount, an Ethernet setup is beneficial. Connect an Ethernet cable from your printer to the router to join the local network immediately. For added control, you might assign a static IP address for the printer using the device’s control panel. On your computer, locate the printer via Printers & Scanners settings by selecting its network address or IP.
Each method has its distinct advantages, from the ease and cleanliness of wireless setups to the reliability of wired connections. Choose the one that best suits your needs, and always refer to specific instructions for your printer model for a smooth setup. For more insights on optimizing your printer setup, check out our services.
Final thoughts
Completing the setup of your new printer is easy when you follow a structured approach tailored to your needs. By methodically preparing the hardware, configuring initial settings, and establishing a stable connection, you’re ready to enjoy seamless printing. Investing time in the correct installation ensures efficient, hassle-free operations, whether for personal use or managing business tasks. Take control of your printing processes with these straightforward steps.
Having trouble setting up your new printer? Don’t waste hours fighting with drivers and connection errors — get fast, friendly tech help today!
Learn more: https://itcarolina.com/about/
About us
At IT Carolina, we make printer setup simple. Whether your printer is USB, Wi-Fi, Bluetooth, or network-connected, our technicians handle everything: driver installation, wireless setup, troubleshooting connection errors, scanner configuration, mobile printing, and network sharing. We work with HP, Brother, Canon, Epson, Lexmark, Xerox, Kyocera, and more. We offer remote support, on-site setup in Charlotte, NC, and business printer deployment. Get your printer working the right way — without the frustration.