
There’s always that one room. The back bedroom where video calls freeze. The garage where your phone gives up. The upstairs office where one bar of WiFi turns a quick email into a battle. Your internet is fine everywhere else, so the problem isn’t your plan — it’s that your signal can’t reach. A WiFi extender is often the cheapest fix, but only if you buy the right one and, just as importantly, put it in the right place. This guide explains both in plain English: which extender you need for your home, exactly where to plug it in, and why the walls in your house matter more than you think.
What Is a WiFi Extender?
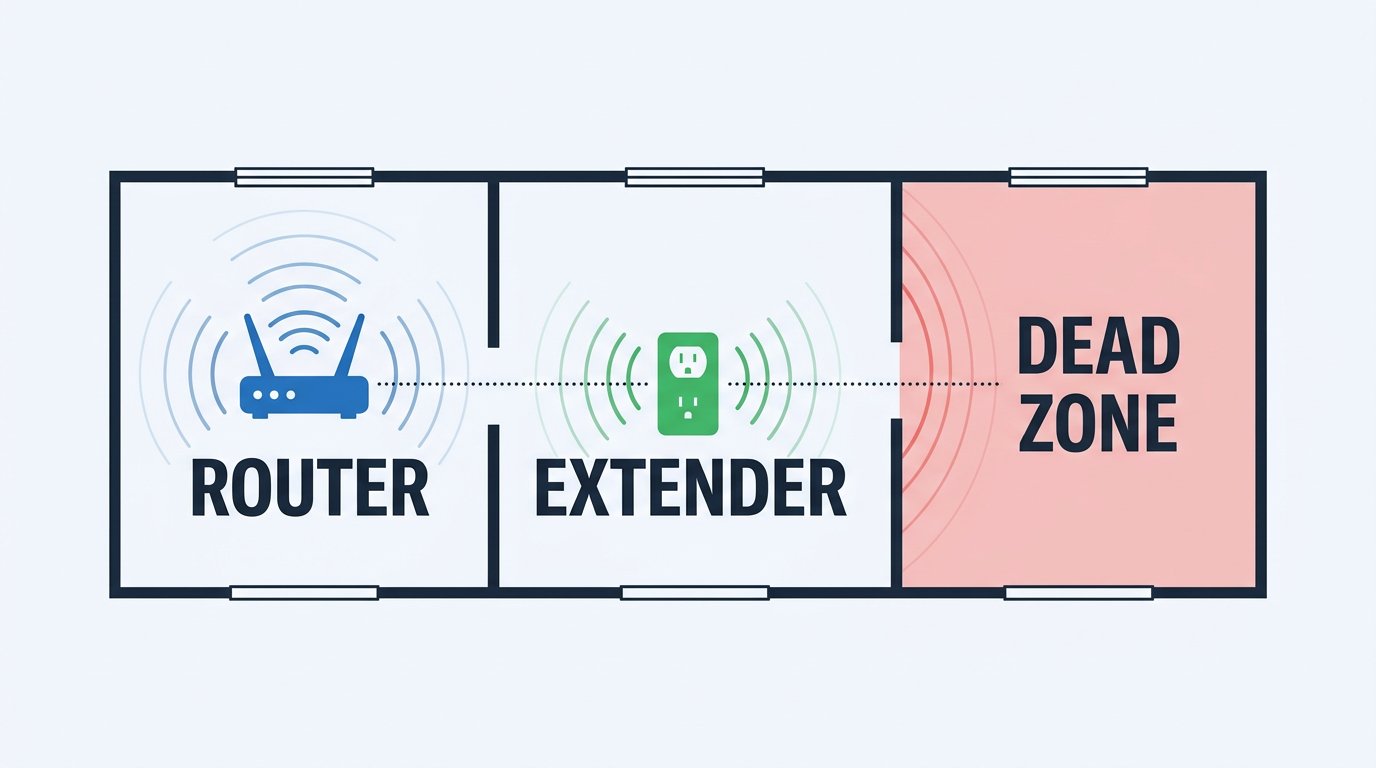
A WiFi extender is a small device that catches your router’s existing WiFi signal and rebroadcasts it into an area the router can’t reach on its own. You plug it into a wall outlet between your router and the weak spot, and it acts as a relay point, pushing the signal further into your home.
Here’s the analogy that makes everything click. Imagine you’re shouting a message across a big field to a friend who’s too far to hear you clearly. An extender is a second person standing halfway, who hears your shout and repeats it onward. But there’s a crucial limit: that middle person can only repeat what they actually heard. If you place them too far away, where your shout is already a faint mumble, they’ll just relay a mumble. Place them where they can still hear you clearly, and the message gets through loud and strong.
That single idea explains why extenders sometimes “don’t work.” It’s almost never the device — it’s placement. We’ll get to exactly where to put it below.
Do You Actually Need a WiFi Extender? (By Home Size)
Before you buy anything, figure out whether an extender is even the right tool. It depends mostly on your home’s size and layout:
| Home Size | Best Solution |
|---|---|
| Under 1,500 sq ft | A good single router usually covers it. One extender if a far room or garage is weak. |
| 1,500–3,000 sq ft | One or two extenders for specific dead spots — or a mesh system for seamless coverage. |
| Over 3,000 sq ft | Mesh system recommended, especially with multiple floors or thick walls. |
| Multi-floor / concrete / brick | Mesh or wired connections beat extenders. Walls work against you here. |
The short version: an extender is the right call when you have one or two specific weak spots in an otherwise well-covered home. If WiFi is weak almost everywhere, the problem is your router or its placement — and our guide on fixing WiFi dead zones covers the free fixes (like simply moving the router) you should always try first.
WiFi Extender vs Mesh: Which Is Right for You?
This is the question that trips up most people, so here’s the honest breakdown.
A WiFi extender is cheaper (often $35 to $110) and perfect for patching one or two dead spots. The tradeoff: many extenders create a second network name (like “MyWiFi_EXT”), so your phone may not switch over automatically as you walk around, and a basic model can reduce speed on the far end.
A mesh system uses several units that blanket your whole home in one seamless network. You never see a second network name, and your devices hand off invisibly as you move from room to room. It costs more (typically $150 and up) but it’s the better answer for whole-home coverage. If your home is large or you want it to “just work” everywhere, read our guide to the best mesh WiFi systems for spacious homes.
Rule of thumb: one or two weak rooms, choose an extender. Weak coverage throughout, choose mesh.
The Best WiFi Extenders to Buy in 2026
You don’t need the most expensive model — you need the right one for your situation. Here are three solid, widely available picks across budgets. One quick tip before you buy: match the extender to your needs the same way you’d choose a router, which our guide to WiFi 5 vs WiFi 6 vs WiFi 7 walks through.
Budget pick — TP-Link RE315 (around $35): A dual-band AC1200 (WiFi 5) extender that’s ideal when you just need to push signal into one more room — a back bedroom, a home office, a porch. It’s small, cheap, and perfectly adequate for browsing, email, and video calls in a single weak spot.
Best all-rounder — TP-Link RE715X (around $90–110): A WiFi 6 (AX3000) extender with a gigabit ethernet port and EasyMesh support, so it can work alongside a compatible router as one network. This is the one to get if you stream, work from home, or want faster speeds in the extended area — and the ethernet port lets you use the superior wired connection if you can run a cable.
Best for mixed-brand setups — Netgear EAX17 (around $100): A WiFi 6 (AX3000) four-stream extender known for working reliably with routers from other brands, set up through the Nighthawk app. A good choice if you want strong performance and don’t want to worry about whether it matches your existing router’s maker.
For a wider, regularly updated comparison with lab testing, Tom’s Guide maintains a tested ranking of the best WiFi extenders that’s worth checking before you buy.

Where Exactly to Place Your WiFi Extender
This is the part that makes or breaks the whole thing. Remember the relay analogy: the extender can only rebroadcast what it clearly receives. So the golden rule is:
Place the extender about halfway between your router and the dead zone — in a spot where it still gets a strong signal, not inside the dead zone itself.
“Halfway” doesn’t mean halfway in distance if there’s a thick wall in between. It means halfway in signal strength. A good test: stand where you’re thinking of plugging in the extender, check your phone’s WiFi bars, and make sure you still see at least two to three solid bars there. If that spot is already weak, move closer to the router.
A few more placement rules that matter:
- Get it up and out in the open. WiFi radiates outward and slightly downward, so an outlet a few feet off the floor beats one behind the couch. Avoid tucking it behind furniture or inside a cabinet.
- Keep it away from interference. Microwaves, cordless phones, large mirrors, refrigerators, and other big metal objects scramble or reflect the signal. Give the extender some breathing room.
- Aim for a clear line toward the dead zone. Fewer walls and obstacles between the extender and the room you’re trying to cover means a stronger result.
- Use ethernet if you can. If the extender has an ethernet port and you can run a cable back to the router, do it. A wired backhaul skips walls and interference entirely and gives the strongest, most stable connection possible.
How Walls Affect Your WiFi (And Which Ones Are Worst)
Here’s something the store never tells you: the materials in your home decide how far your WiFi travels. Think of each wall like a curtain muffling sound — a thin cotton curtain barely changes the volume, but a thick padded one blocks almost everything. WiFi works the same way with different building materials.
From least to most disruptive:
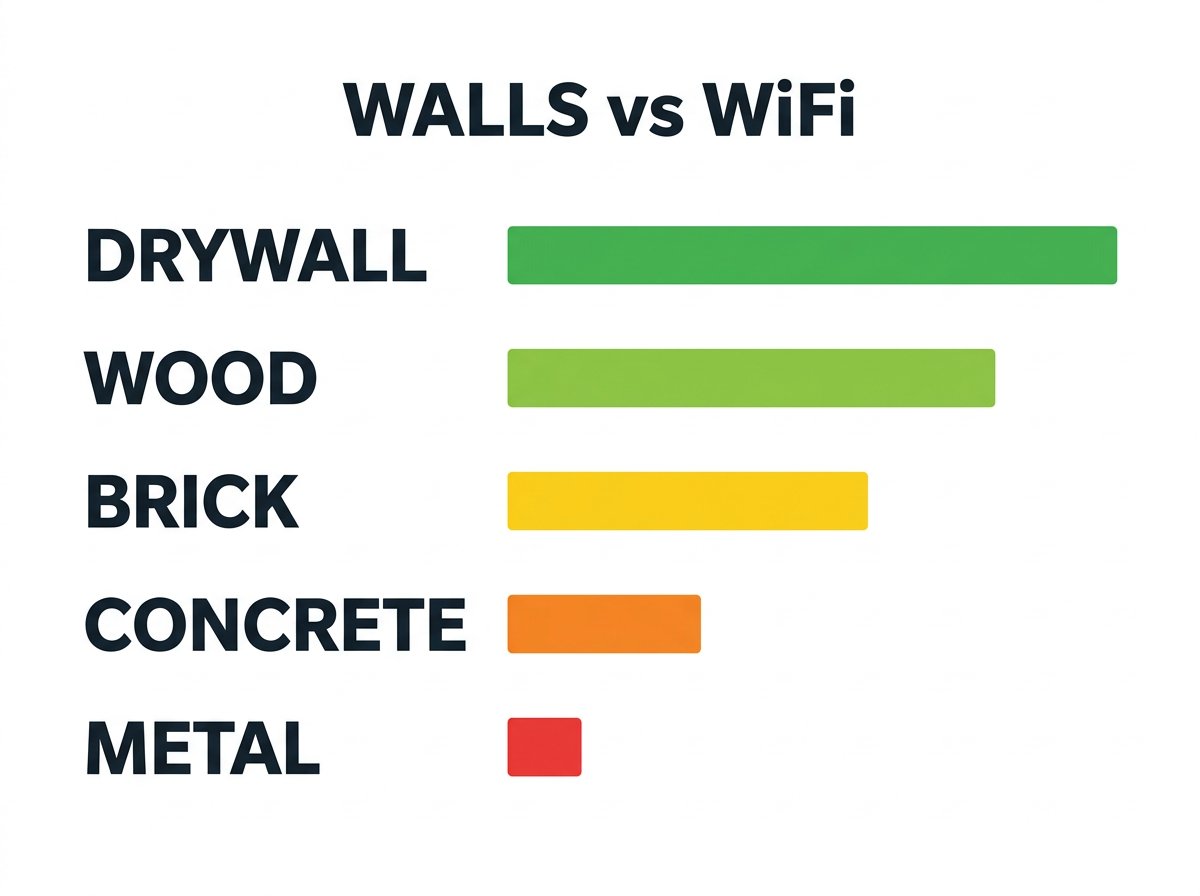
- Drywall and wood (low impact): Standard interior walls barely slow WiFi down. Signal passes through easily.
- Glass (low to medium): Plain glass is fine; some energy-efficient coated windows are worse than you’d expect.
- Brick and tile (medium to high): Dense materials absorb a noticeable chunk of signal. A brick chimney or tiled bathroom can create a surprising dead spot.
- Concrete (high): Thick concrete walls and floors are major signal killers — a common culprit in basements and multi-floor homes.
- Metal (severe): Metal reflects WiFi rather than letting it pass. Metal studs, foil-backed insulation, large appliances, metal filing cabinets, and even big mirrors can block signal almost completely. Water counts too — a large aquarium or water heater absorbs WiFi.
The practical takeaway: if a concrete or metal wall sits between your router and the room you’re trying to cover, no extender will punch cleanly through it. The fix is to route around the obstacle — place the extender so its path to the dead zone avoids the worst wall, or run an ethernet cable to skip the problem entirely.
How to Set Up a WiFi Extender (Step by Step)
Modern extenders are genuinely easy to set up. Here’s the general process — exact steps vary slightly by brand, but the flow is the same.
Step 1: Plug the extender into an outlet close to your router first — within the same room. You’ll move it to its final spot after setup.
Step 2: Connect it to your router. The easiest way on most models is the WPS button: press WPS on your router, then on the extender, and they pair automatically. Alternatively, use the manufacturer’s app (like TP-Link Tether or Netgear Nighthawk) or connect to the extender’s temporary setup network and follow the prompts.
Step 3: Name the extended network. Some people use the same name and password as their main WiFi so devices roam more smoothly; others keep a separate “_EXT” name to control which network they join. Either works.
Step 4: Unplug it and move it to its real home — that halfway spot with a strong signal. Most extenders have a signal-strength light that tells you whether the location is good. Green or solid usually means you’re in a strong spot; red or blinking means move it closer to the router.
Step 5: Test it. Walk to the dead zone with your phone and run a quick speed test. If it’s better, you’re done. If not, the extender is likely too far from the router — move it a bit closer and test again.
Common Mistakes That Make Extenders Useless
When someone tells me their extender “did nothing,” it’s almost always one of these:
- Plugging it into the dead zone. The number one mistake. If the extender can barely hear the router, it has nothing strong to rebroadcast.
- Hiding it behind furniture or in a cabinet. Enclosed, low, or blocked placement wastes most of the device’s range.
- Buying a model too weak for the job. A cheap single-band extender struggles to feed a home office full of work devices. Match the extender to the load.
- Expecting it to beat a concrete or metal wall. Some obstacles simply require a different approach — mesh or ethernet.
- Ignoring the router itself. If your router is ancient or badly placed, fix that first. An extender amplifies whatever signal it gets, including a bad one.
Case Study: The Garage Office That Finally Got Online
A client in Charlotte’s Plaza Midwood neighborhood had converted his detached garage into a home office, and the WiFi was unusable out there — video calls dropped constantly and large files refused to upload. He’d already bought a cheap extender, plugged it into the garage, and concluded extenders “don’t work.” The problem was textbook: he’d placed it inside the dead zone, where it was catching almost no signal from the house to begin with.
When we looked at the layout, the path from the router to the garage crossed an exterior brick wall and about 40 feet of open yard — too much for the extender to bridge from where he’d put it. We moved the extender to an outlet in the room of the house closest to the garage, where it still had a strong three-bar signal, giving it a clear shot across the yard. That alone took his garage from unusable to solid video calls.
For the heaviest file transfers he still wanted more, so we ran a single outdoor-rated ethernet cable to a second extender in the garage as a wired backhaul — rock-solid, full-speed, no walls in the equation. Total hardware cost was under $120. The lesson he took away: the extender was never the problem; where he’d put it was. If you’re wrestling with a stubborn dead zone and not sure whether an extender, mesh, or a cable is the right answer, that’s exactly the kind of thing we sort out quickly for homeowners across the Charlotte, NC area.
Frequently Asked Questions
- Do WiFi extenders really work?
- Yes, when placed correctly. An extender catches your router’s signal and rebroadcasts it, but it can only relay what it receives — so it must sit where the router’s signal is still strong, about halfway between the router and the dead zone. Placed wrong, it seems useless; placed right, it reliably fills one or two weak spots.
- Where should I put my WiFi extender?
- Roughly halfway between your router and the dead zone, where the extender still gets two to three solid bars. Use an outlet that’s elevated and out in the open — not behind furniture or next to a microwave, fridge, or mirror. The biggest mistake is putting it inside the dead zone itself.
- Do WiFi extenders slow down your internet?
- A basic single-band model can roughly halve speed on connected devices. Dual-band, tri-band, or ethernet-backhaul models avoid most of this. A small speed dip in a far room usually beats no signal — but if speed there is critical, mesh or a wired connection is better.
- WiFi extender vs mesh — which is better?
- An extender is cheaper and great for one or two dead spots. Mesh costs more but gives one seamless whole-home network with no separate name and no drops as you move. Small home with one weak corner: extender. Large or multi-floor home, or whole-home coverage: mesh.
- Can a WiFi extender send signal through walls?
- It helps, but walls still matter. Drywall and wood barely affect WiFi; brick, concrete, tile, and especially metal heavily weaken or block it. An extender works best with a clear, low-obstruction path to both the router and the target area. Thick concrete or metal may require repositioning, ethernet, or mesh.
- What size home needs a WiFi extender?
- Homes under about 1,500 sq ft are usually covered by a good router, with one extender for a far room. From 1,500 to 3,000 sq ft, one or two extenders or mesh helps. Over 3,000 sq ft or multi-floor with thick walls, mesh is usually better. Layout and wall materials matter as much as square footage.
- Should I connect my extender with an ethernet cable?
- If you can, yes. An extender with an ethernet port can connect to your router by cable (a wired backhaul), skipping walls and interference for the strongest, most stable result. It’s the best option when running a cable is practical — to a home office, garage, or upstairs room with an existing ethernet run.
Still Stuck With a Dead Zone? Let’s Fix It Right
Choosing between an extender, a mesh system, and a cable — and getting the placement exactly right — is the difference between WiFi that finally works and money spent on a device that “did nothing.” If you’d rather skip the trial and error, IT Carolina diagnoses and fixes WiFi dead zones for homeowners and small businesses across the Charlotte, NC area. We figure out what your home actually needs, set it up correctly, and make sure every room is covered.
Tired of fighting with a weak signal? Contact IT Carolina to schedule a remote or on-site visit — we’ll get every corner of your home online.
John Jones
Senior IT Specialist, IT Carolina
John has 12 years of hands-on experience diagnosing and resolving computer, printer, and network issues for homeowners and small businesses across Charlotte, NC. He has helped hundreds of clients recover from Windows update failures, driver conflicts, and hardware problems — often resolving in a single remote or on-site session.